Text: Solveig Hansen, 2016
All in one place. That’s the difference between Scrivener and Word. Here are some basics, just to get you started.
When writing in Word, you often have many documents to handle. You might have one file for each chapter in addition to separate reference files, both images, PDFs and web pages, to toggle to and from.
Scrivener keeps the whole writing project in one place, giving you easy access to your manuscript and reference files. You have a Draft folder for your manuscript and a Research folder for reference documents. The makers of Scrivener – with the delightful name Literature & Latte – call it a writing studio and use digital versions of typical office tools like index cards, binder and corkboard as part of the user interface.
Scrivener is both a writing and a planning/organizing tool. You can write or paste the whole text in Scrivener and then organize it in smaller chunks. Or, you can start by outlining your story before you write the actual content. We’ll do the latter in this post.
The sample project below explains how to outline an article about the typical story structure, using the movie Casablanca as an example. We want to write something on each of the main sections: Setting, Protagonist, Characteristics of Rick, Introduction, Conflict, Turning point/climax, and Resolution, so we start by creating these sections.
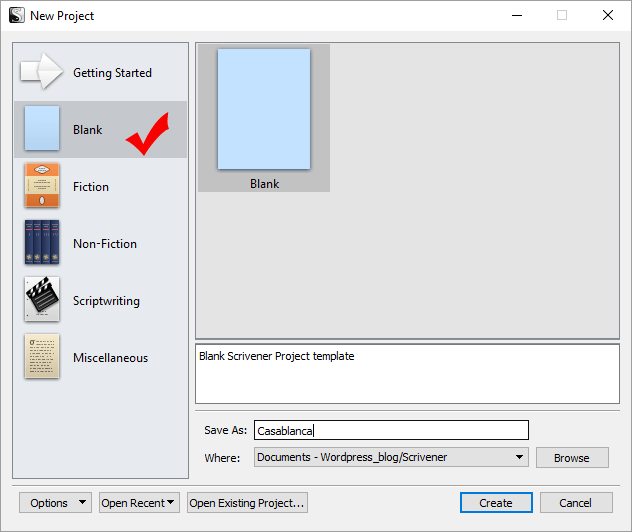
In Scrivener, click File > New Project. Choose Blank, write the project name in the Save As box, choose where to save the project and then click Create.
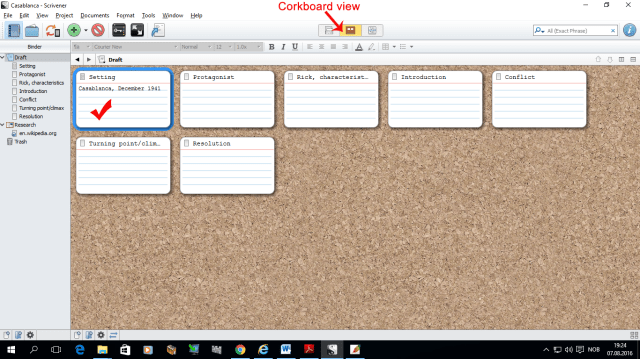
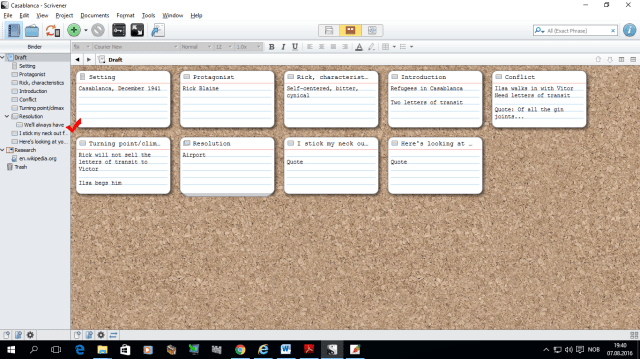
The Editor window opens. Type “Setting.” “Setting” appears in the Draft folder in the Binder to the left.

Create the other sections while you’re at it. Click the green + button on the menu bar and type “Protagonist.” Do the same with Characteristics of Rick, Introduction, Conflict, Turning point/climax, and Resolution. Click the Draft folder in the Binder. Each section is presented as its own index card on the corkboard. (The Corkboard view should be selected automatically.)
Double-click the Setting index card and type some keywords. I wrote “Casablanca, December 1941.”
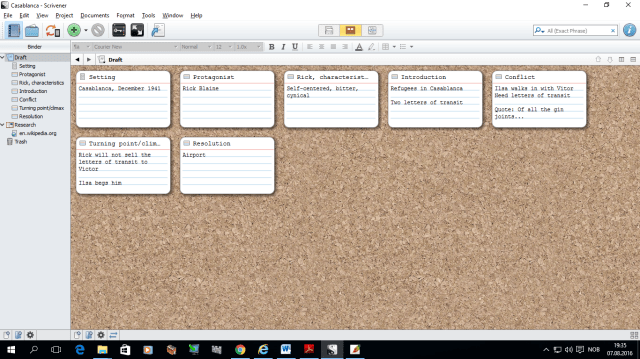
Do the same with the other index cards.
I also added some of the famous quotes from the movie that I wanted to put somewhere in the article.
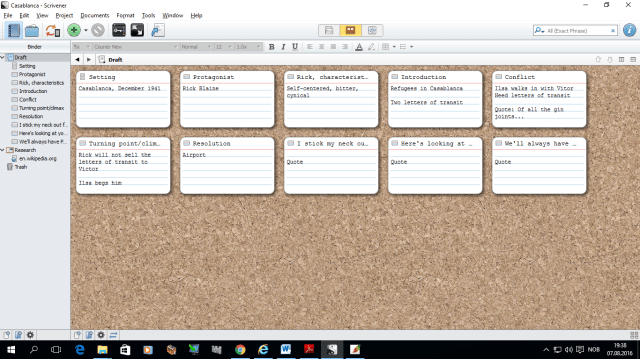
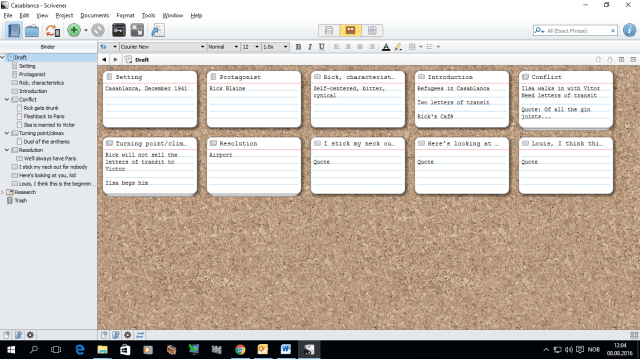
“We’ll always have Paris” of course belongs in the Resolution section at the airport. Drag it to the Resolution folder to add it as a “scene” in its own sub-folder.
Continue to add scenes as needed (the green + button, remember?). The flashback to Paris occurs as part of the conflict, while the battle of the anthems is a crucial turning point.
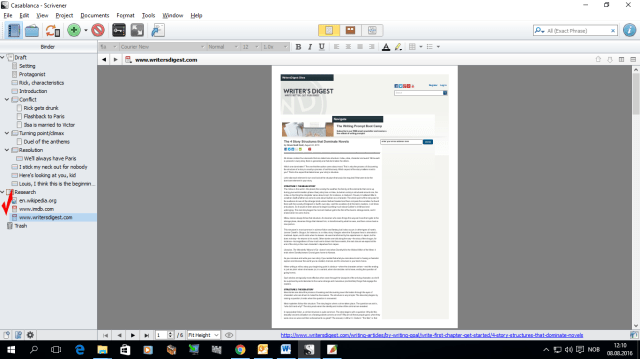
In the Research folder, add relevant reference documents, for instance web sites. (Note: This works better in Mac than in Windows. While Mac lets you drag in or import live web sites, not all sites can be imported with the Windows version. Try the various import options to see how they work on your PC. “PDF Document via WebKit” is the option that imports the web sites for you to view them inside Scrivener. If a web site cannot be imported, only a link to the site is added.)
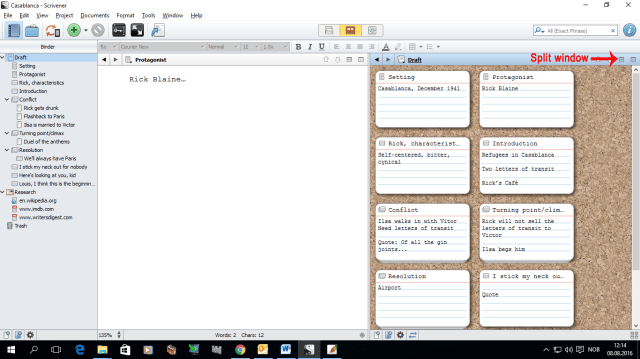
Click a section in the Draft folder to start writing the content. You can write in a full Editor window or split the window to show another window next to the Editor, for instance the corkboard:
Or a web site:
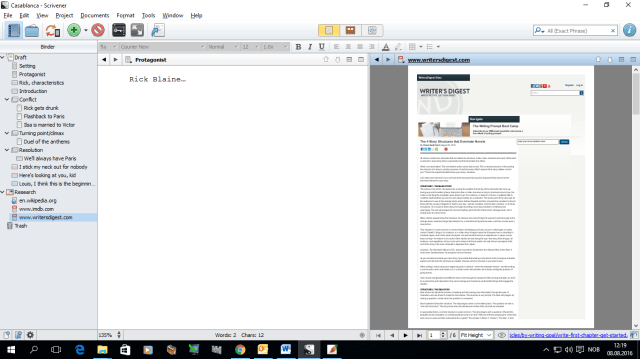
Scrivener allows you to import and export text in a range of formats, including from and to Word.
Producers: Literature & Latte
Platforms: Mac, Windows, iOS
Price: USD 40
Trial version: Free 30 days trial
Read more detailed information
Introduction video:

One thought on “How to use Scrivener as an outline tool”